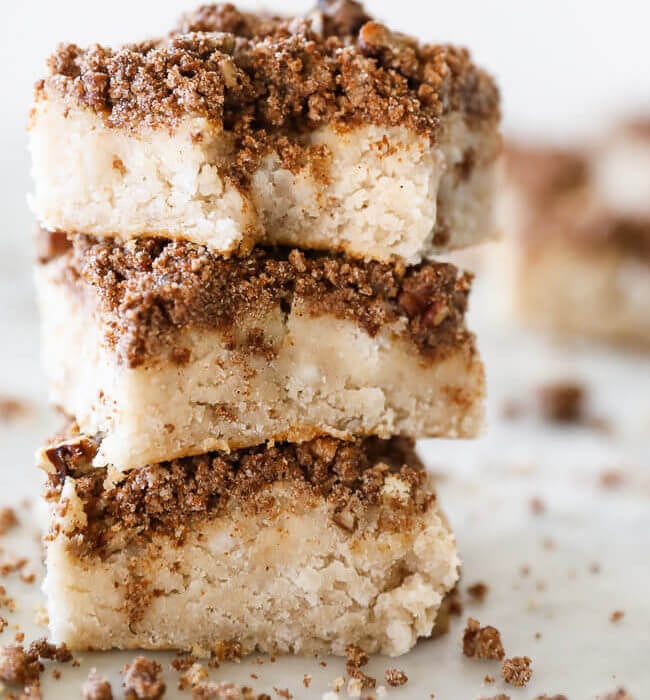
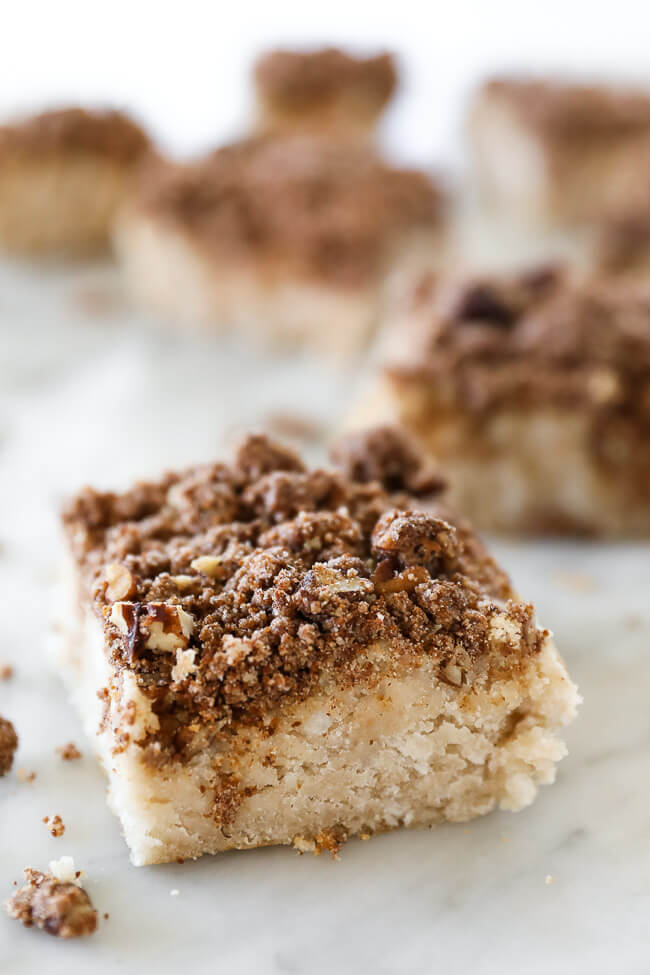
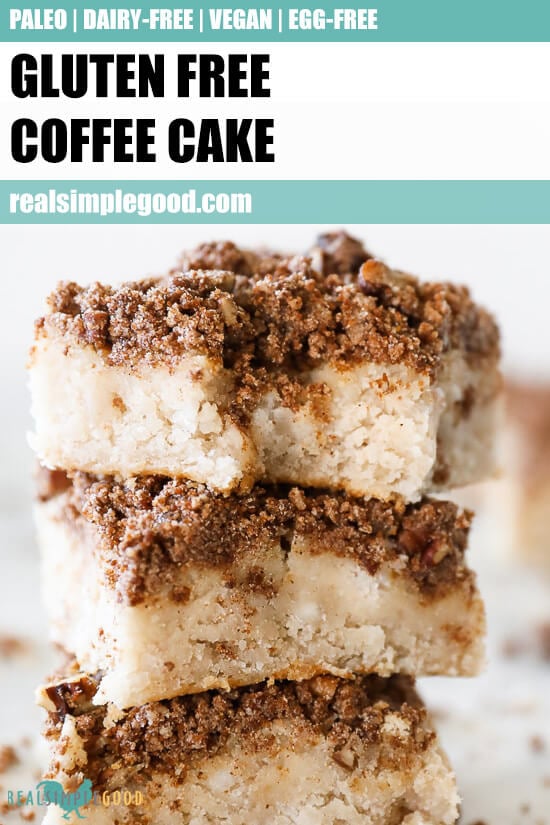
Whether you’re looking for a yummy brunch recipe, a special treat or have just been thinking coffee cake sounds good, this Gluten Free coffee cake is Paleo and Vegan friendly. It’s the perfect companion with your morning cup or makes an indulgent afternoon pick-me-up. You can also enjoy it for an evening treat, too! You decide!
What kind of flour do you use for this gluten free coffee cake?
We often bake with almond flour, but decided to mix it up this time because we get requests for nut-free options. So, for this gluten free coffee cake, we used Otto’s Naturals Cassava Flour. Cassava flour is made by grinding up yuca root, which is a tuber. Tapioca flour also comes from the yuca root, but they are made with separate processes, and therefore cannot be used synonymously.

Do you have tips for baking with cassava flour?
Cassava flour is starchy, and it has a consistency most like traditional wheat flour. While lots of recipes say that cassava flour can be used in place of wheat flour in a 1:1 ratio, I have noticed that it settles quickly and can end up quite dense. So, here are two tips for baking with cassava flour that will help you get the best results.
- Always whisk the flour before you measure it out. And then measure quickly, before it fully settles. I just stick a whisk in the bag and give it a couple good stirs, and then measure right away.
- If you happen to have a food scale and can measure out in grams, you’ll get an even more precise measurement. We don’t have a food scale, so I go with the method mentioned above.
But there are pecans in the topping, so it’s not nut-free?
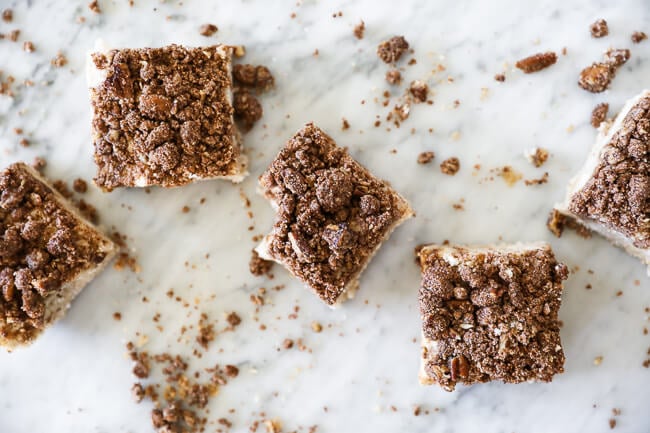
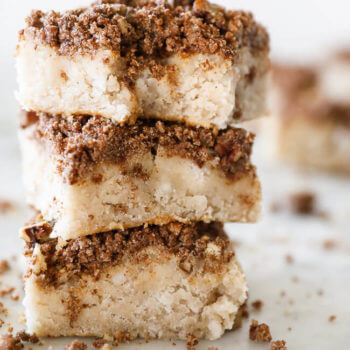
Correct. The recipe does call for pecans in the topping because I love them. That said, you can easily omit them and just have a traditional cinnamon/sugar like crumble topping if you are eating completely nut-free. I just prefer the extra texture and nuttiness of the pecans. But you do you, and best serve your own body.
We teamed up with some of our favorite Paleo bloggers!
Check out these great holiday recipes from our friends over at Real Food with Jessica, Paleo Running Momma, Mary’s Whole Life, The Wooden Skillet and Wholesomelicious!
- Paleo Double Chocolate Peppermint Cookies – Wholesomelicious
- Paleo Blackberry Cheesecake Jars – The Wooden Skillet
- Paleo Peppermint Bark – Real Food with Jessica
- Paleo Gingerbread Bundt Cake – Paleo Running Momma
- Paleo Buckeye Balls – Mary’s Whole Life
Your turn to try our gluten free coffee cake
Looking for a gluten free coffee cake that nobody will ever know is free of gluten, grains and eggs?! This is it! Go ahead and try, and leave a comment below to let us know how it goes. Also, take a pic to share on Instagram and tag us @realsimplegood so we can see. Make sure to give us a follow if you don’t already – let’s stay connected!
Like this Recipe?
SHARE IT NOW OR PIN IT FOR LATER!
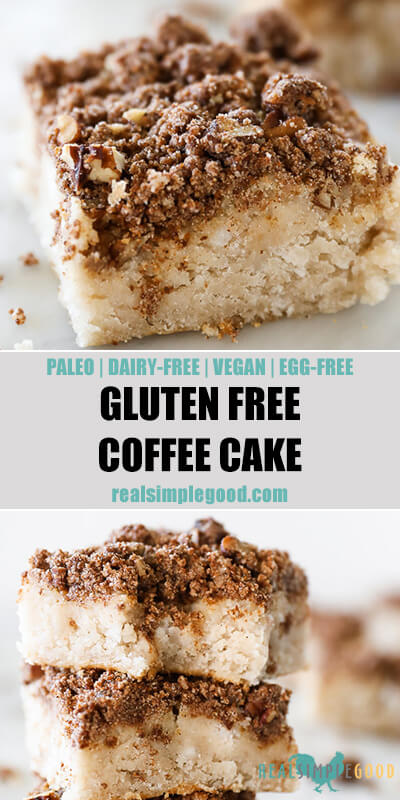
Gluten Free Coffee Cake (Paleo + Vegan with Nut-Free Option)
Ingredients
- 1.5 cups Cassava Flour, (whisked before measuring, we like the brands Bob's Red MIll and Otto's Naturals)
- 2 tsp paleo baking powder
- 1/2 tsp sea salt
- 1/2 cup coconut butter, softened, (plus more for optional drizzle on top if desired)
- 1/4 cup coconut oil, room temperature
- 1/2 cup coconut milk
- 1/3 cup maple syrup
- 1/4 cup unsweetened applesauce
- 1 tbsp apple cider vinegar
For the topping:
- 1/2 cup Otto's Naturals – Cassava Flour, (whisked before measuring)
- 1/4 cup coconut sugar
- 1/4 cup pecans, chopped, (omit for nut-free)
- 3 tbsp coconut oil, melted
- 2 tsp cinnamon
- 1/4 tsp sea salt
Instructions
- Preheat oven to 400° Fahrenheit and line a 8×8 inch dish with parchment paper.
- In a large mixing bowl, combine cassava flour, baking powder and sea salt with a fork.
- Using the fork, "cut" coconut butter and oil into dry ingredients until small bits form.
- Add coconut milk, maple syrup, apple sauce and apple cider vinegar and mix with fork until combined.
- Transfer cake mixture into prepared baking dish and spread out with your hands into an even layer.
- Make the topping by combining all the topping ingredients in the bowl you just used and mix until clumps form. Don't overmix – you want it crumbly.
- Sprinkle topping over cake, and transfer to the oven. Bake for about 20 minutes. When a knife comes out clean, remove from the oven and let cool before slicing.
- Serve and enjoy. You can drizzle some extra coconut butter if you want, too! We love it best served a little warm, so we usually re-heat it for about 10-12 seconds in the microwave.


Tried this recipe for the first time today. It is a delicious coffee cake! I measured the cassava flour as described (after whisking) and then weighed it. There was quite a bit more cassava flour than required by weight, so I used the lesser amount based on weight. It was my first time using coconut butter. I used the coconut manna shown in the link and put the jar in warm water to soften and stir it. Not sure that was necessary? But it came out great and looks just like the photo. Nice option for a gluten free, egg free treat.
Thanks for the great review Karen!
I can not use cassava flour, “According to Dr. Nasr, this plant [Cassava] is known to contain poisons that can impede an already underactive thyroid.” Can I use a standard non-gluten flour blend like King Arthur, measure for measure?
Hi there – I haven’t tried it with a gf flour blend, but I think it might work just fine. Report back how it goes if you try. I’m sure other readers might be curious, too. 🙂
Can you substitute oat milk for coconut milk??
Yep, that should be ok! 🙂
Can I use a nut butter in place of coconut butter?
Hi there, unfortunately I haven’t tested that so I can’t say how it would turn out. I think it could work potentially, but it also might alter the taste and consistency.
Wondering what I did wrong. This turned out absolutely terrible. It was so chewy (and not in a good way) that it was inedible.
Oh no! That’s a total bummer. I’ve heard folks have varying results for a couple reasons – brand of cassava flour (and method for measuring it out) and/or not using parchment paper to line the pan. We’ve only baked with Bob’s Red Mill and Otto’s brand cassava flour, and they’re the only ones we recommend. Also, when measuring out cassava flour, you need to whisk the flour and measure before it settles because it can be quite dense which impacts the cooking. Sometimes I even whisk and then use a spoon to add it to the measuring cup. Do any of these things sound like something different than what you did?
I used Bob’s Red Mill and measured using a scale. I did also use Parchment paper but it was white vs unbleached, which I usually never use, if that makes a difference?
I think I’ve used both white and unbleached parchment in the past, so I doubt that would have an impact. Admittedly, I’ve never measured my flour with a scale, so I’m not sure on that. It would definitely be more precise. Out of curiosity, I’d try measuring out how I explained and comparing it to what you weighed just to see how different it is. Otherwise, it could just be oven variances (do you have an older oven?) and potentially altitude maybe. One last thought I just had…you did use coconut butter (not coconut oil), correct? Sometimes readers don’t understand that there’s a big difference and I’ve had people run into issues due to that on other recipes.
I made this and it was amazing! I have been missing coffee cake and this hit the spot.
Yay! So glad to hear you loved it! It’s one of our favorites! 🙂
Love it!