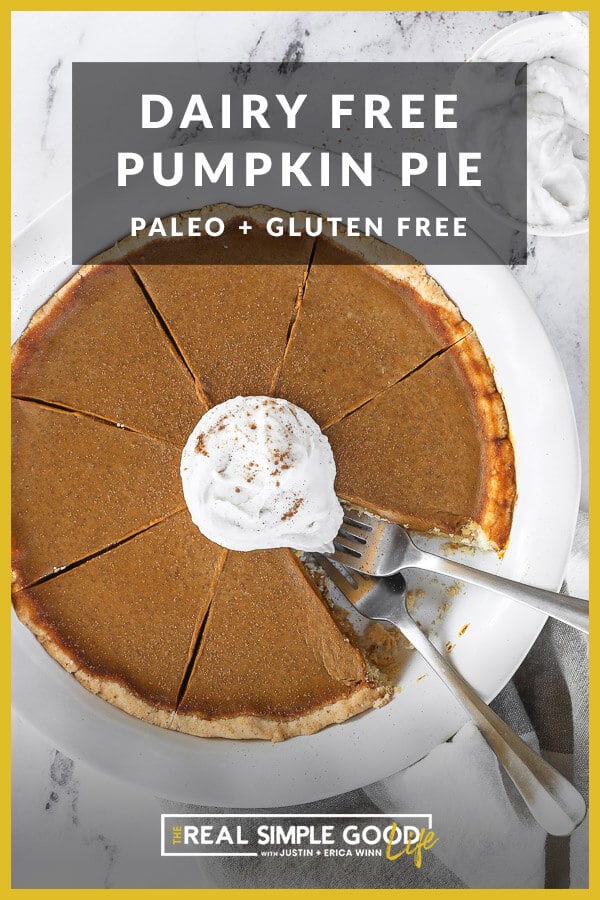
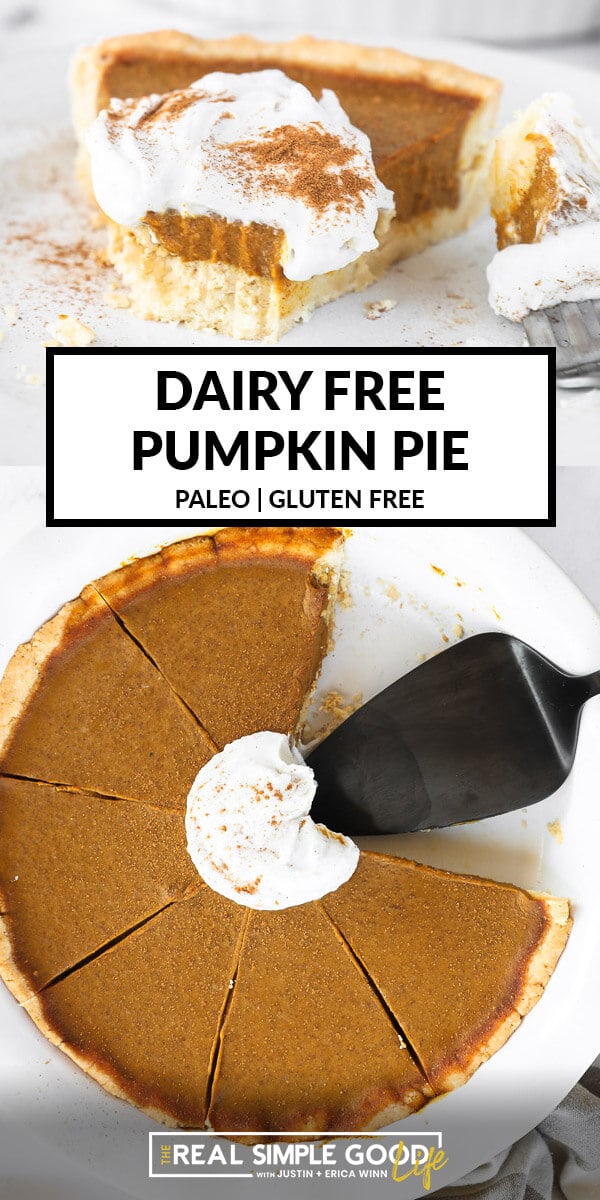
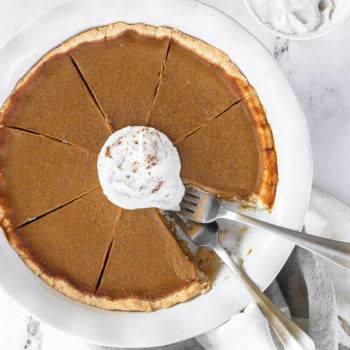
This recipe for dairy free, gluten free pumpkin pie crust and pumpkin pie filling is buttery, flakey and melt-in-your-mouth good! It’s Paleo and refined sugar free, too. Enjoy!
Disclaimer: We partnered with Bob’s Red Mill to bring you this post. We only work with companies and brands we truly believe in and use ourselves. Therefore, all opinions and recipes are entirely our own. Thank you for supporting Real Simple Good and our partners.
How to make a gluten free pie crust
The crust is actually really simple and bakes in just 12-13 minutes! You just need a food processor. Here are the easy steps we use to make this gluten free pie crust.
- Add all of the dry crust ingredients to the bowl of your food processor.
- Add the wet ingredients on top.
- Pulse the wet ingredients into the dry ingredients until a dough forms. It will start to stick together and make balls in the food processor. I pulse on and off until I get to one or two balls of dough.
- Then, just press the dough out into your pie dish, so it’s in as even of a layer as you can get it with the edges pushed up along the side of the dish. I like to poke holes in the crust with a fork so that it doesn’t get air bubbles in it while it bakes.

What are your favorite Gluten Free baking flours?
We used Bob’s Red Mill Paleo Baking Flour, which has become a go-to for baking for me because it really takes the thinking out of what can be kind of complicated. It’s a great blend of Gluten Free and Paleo-friendly flours (almond, arrowroot, coconut and tapioca flours) in just the right proportions. For this pie crust, I also added a bit extra of their Tapioca Flour to make the crust a little more doughy and pliable for pressing into your pie dish.
We have been using Bob’s Red Mill for years and love their dedication to high-quality, minimally-processed products from the mill to our table. All of their products are also certified Kosher and made with ingredients grown from non-GMO seeds.

How to make Dairy Free pumpkin pie filling
This dairy free pumpkin pie filling leaves nothing to desire. It is buttery and velvety smooth, with the perfect amount of spice. It is both dairy and egg free and no bake to boot – a great time saver! So, while your gluten free pie crust is baking, make the pumpkin pie filling on the stove real quick. It’s super quick and easy. Here’s what you do.
- Add all of the pumpkin pie filling ingredients, except for the water and gelatin, to a sauce pan. Turn the heat on to medium-low and whisk the ingredients together.
- While the mixture heats up, combine the warm water and gelatin in a ramekin or small bowl. You’ll want to whisk the gelatin into the water as you pour it in to avoid clumps forming. If there are any clumps, just toss them out.
- Pour the gelatin mixture into the sauce pan and continue to whisk everything together. Once combined, turn the heat off and let it cool until the crust is ready.
Some tips for putting it all together
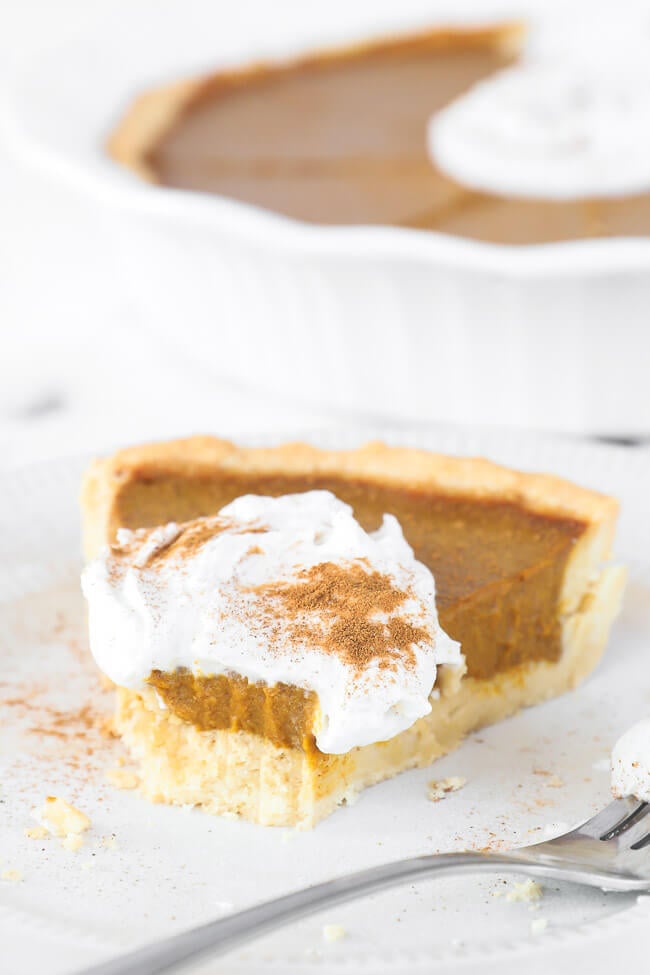
Once the pie crust has cooled enough that you can touch the dish, pour the dairy free pie filling into the crust. Cover the pie and place it in the fridge to set. Use something to cover the dish that won’t adhere to the pie filling. We use bees wrap or leave it uncovered until it’s set and then cover.
PRO TIP: It works best if you make this gluten free pie a day in advance so it can set in the fridge overnight.
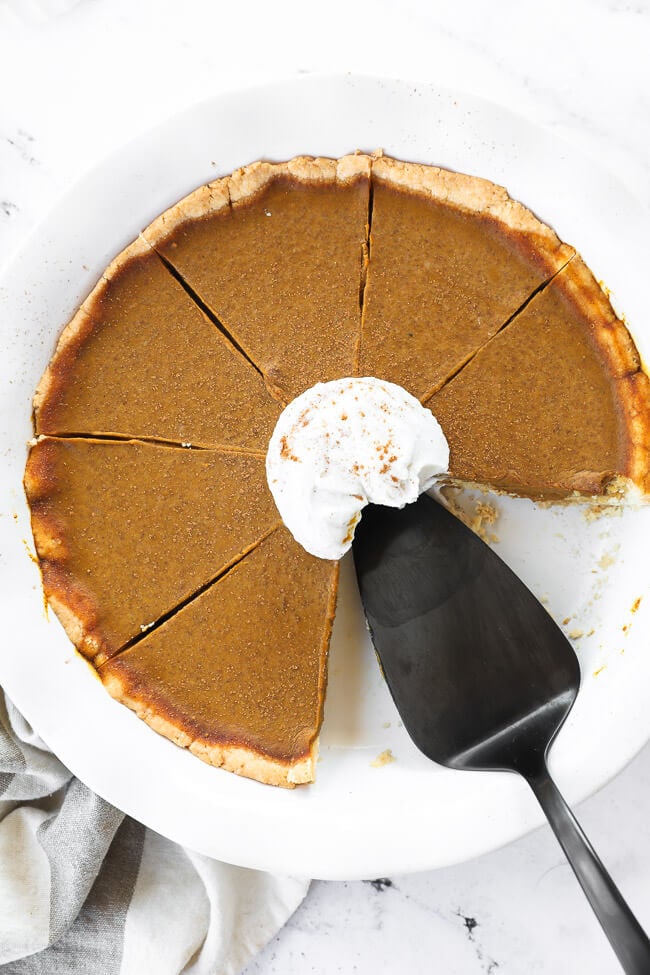
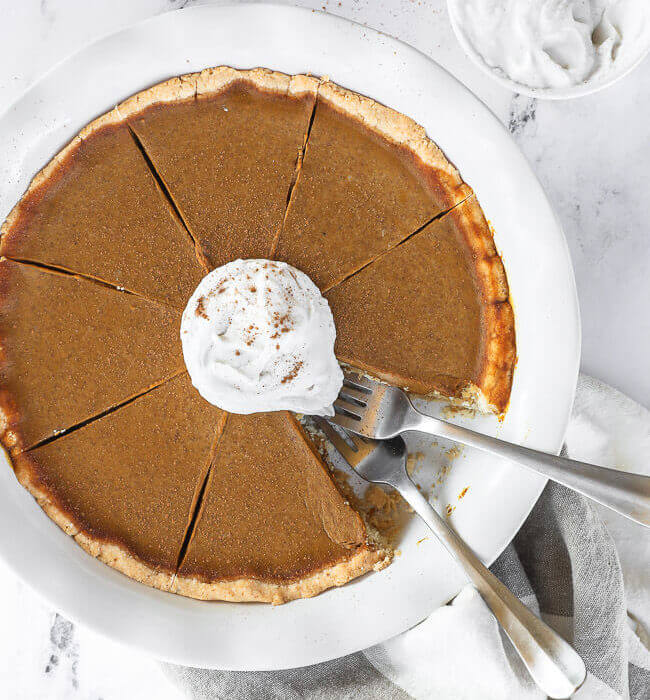
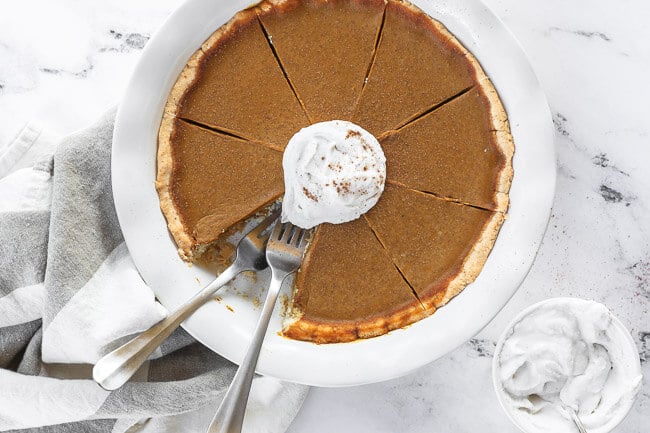
Don’t forget the whipped coconut cream
Pumpkin pie just isn’t the same without a big dollop of whipped cream on it!
If you’re Paleo or dairy free, you can have some whipped coconut cream with this pumpkin pie. We have a comprehensive post on how to make whipped coconut cream so you can get the perfect topping for your pie every time!
Some other holiday menu ideas
- THANKSGIVING YAMS
- LOADED MASHED CAULIFLOWER
- BACON WRAPPED STEAK BITES
- GARLIC BASIL NUT HUMMUS
- MINI BACON WRAPPED MEATLOAF
Your turn to try our Dairy Free and Gluten Free pumpkin pie
Grab some Bob’s Red Mill Paleo Baking Flour and Tapioca Flour and make this dairy free and gluten free pumpkin pie for all your holiday festivities this year! It will be a hit across the board, and you will love that it tastes like you spent way more time on it! Leave a comment below to let us know how it goes. Also, take a pic to share on Instagram. Tag us @realsimplegood so we can see, and give us a follow if you don’t already! We’d love to stay connected!
Like this Recipe?
SHARE IT NOW OR PIN IT FOR LATER!
Dairy Free, Gluten Free Pumpkin Pie
Ingredients
For the crust:
- 1.25 cups Bob’s Red Mill Paleo Baking Flour
- 1/4 cup Bob’s Red Mill Tapioca Flour
- 1/4 tsp sea salt
- 1/2 cup palm shortening
- 1 tsp pure maple syrup
For the filling:
- 1 can pumpkin puree, (15 oz can)
- 1 cup coconut milk
- 1/2 cup coconut sugar, (or sub 1/4 cup pure maple syrup)
- 2 tsp pumpkin pie spice
- 1 tsp cinnamon
- 1 tsp vanilla
- 1/4 tsp ground ginger
- 1/8 tsp ground cloves
- Pinch of sea salt
- 1/4 cup warm water
- 1 tbsp gelatin, (make it a heaping tablespoon)
Equipment
Instructions
- Preheat oven to 375° F and make crust.
- Place all of the crust ingredients in the bowl of your food processor. Pulse the palm shortening and maple syrup into the dry ingredients until dough forms.
- Press the dough into a 9" glass pie dish.
- Transfer to oven and bake for about 13 minutes until the crust just starts to turn golden brown. Remove from oven and set aside to cool.
- While the crust is baking, make the filling.
- In a medium saucepan over medium-low heat add all of the filling ingredients except for the water and gelatin. Stir to combine and let mixture heat through, just about 3-4 minutes.
- In a small bowl, whisk water and gelatin. Add to sauce pan and stir again to combine everything. Remove from heat and let cool while crust finishes baking.
- Once crust cools enough that you can hold the glass dish, pour filling over crust. Cover and place in the fridge to set. When you cover, use something firm that won't adhere to the pumpkin filling. We use Bee's Wrap. It works best if you can let the pie set in the fridge overnight or for several hours at least.
- Once set, remove from fridge and serve. Serve as is or with whipped coconut cream or ice cream and a sprinkle of cinnamon.

It’s great to see such detailed information. The article shared in great detail what I was looking for.
Nice
Nice
Can this recipe be used for a two crust pie?
I don’t recommend it. It is easy to press into a pie dish and works great for this recipe, but it doesn’t perform as well rolled out to use on top of a pie.
Made this pumpkin pie for Thanksgiving and it was great! The best part, for me, was how easy the crust was to make compared to traditional roll out crusts. And because it is baked on its own I didn’t burn it! :0 The filling has a great texture and classic flavor. Yum!
Sooo happy you enjoyed it! I’m kind of a lazy baker, so an easy crust is a must for me. Glad you appreciated that, too! Thanks so much for coming back to share your review! We really appreciate it! 🙂
I loved this recipe! Other dairy-free pie fillings I’ve tried just haven’t made the cut in terms of texture (although I was vegan then so I didn’t use gelatin). Now that I’m gluten-free I thought pumpkin pie, one of my favorite desserts, was out of my life forever, but this recipe proved that I can still have it and it can still be really good! The crust is obviously not exactly the same as wheat flour crust, just a little bit more crumbly, but the taste totally makes up for it, and it was an amazing treat to have this Thanksgiving. Thank you for an awesome recipe!
Hooray! So so happy to hear it was a hit and made your Thanksgiving feel complete! Thanks so much for us inviting us to your table and trying our recipe! We hope to see you back again soon! 🙂
These look AMAZING !! it’s very useful video
Thank you!
Thanks! Hope you give it a try!
The recipe doesn’t specify how long to cook the pumpkin mixture before adding the diluted gelatin mixture. Do I bring it to a boil? Do I heat it to a certain temperature?
You just heat it through, like 3-4 minutes. I’ll update the recipe to say that. Thanks for asking! 🙂
what veg version of gelatin can i try?
Honestly, I haven’t tried any other options, but maybe flax eggs or eggs. I haven’t played with it, so I can say for sure. Sorry that’s not super helpful.
Our family has nut allergies. Is their a flour substitute that does not have almond flour as part of the mix?
Hey there – we haven’t tried to make a nut free version yet, but I think if you’re willing to play around a bit you could do a version with tapioca flour and coconut flour. There are also some other gluten-free flour mixes out there that you try. Bob’s Red Mill has a gluten-free mix that is nut free – it has some other ingredients in it though that you may be avoiding if you are strict paleo. Same with the brand King Arthur. They both have potato starch in them, which I can’t have (bummer!) so I haven’t tried them, but they are nut free. Hope that helps!
Thank you. I have had good success with those other mixes in the past so I will give them a try and figure out the necessary changes. Looking forward to trying your filling.
Great! Let us know what you think! Can’t wait to hear! 🙂
That sounds fantastic but I’m pretty sure cavemen did not eat pumpkin purée out of cans.:)
True! If you are really feeling caveman-like, you can definitely cook a real pumpkin (over fire of course) and mash it using primitive tools (your hands)! 🙂
Your reply just brought a smile to my face! As a celiac who is gf, df and sf by necessity I appreciate your site and have enjoyed many of your recipes, the spaghetti squash and meatballs being a favorite of my family-none of whom have my dietary restrictions. Thanks for doing what you do!
Hope everyone loves this one! We’re so glad you found us! Thanks for trying our recipes and taking the time to come back and share! We love hearing from you! 🙂
This time of year I will purchase the small pie pumpkins from a squash farm and bake, clean out and puree with my spices then pour into ziploc baggies and freeze. If your adverse to plastic baggies, then don’t freeze it, make it immediately. :))
Justin’s mom does this as well with the squash that she grows on her little farm! Great idea!
What is palm shortening? I’m not a baker and would rather not buy something I won’t use again until next Thanksgiving. Would coconut oil be a decent substitute?
Hey there! It’s basically a coconut version of traditional shortening. You could substitute with equal parts coconut oil and butter if you tolerate dairy. Hope that helps!
that would save the lives of many gorillas. palm oil consumption is incredibly destructive to theit habitat
Agreed – you have to find the brands that are sourcing their palm oil sustainably and without destroying habitats. We like the brands Tropical Traditions and Nutiva, who source their palm products sustainably.